Prep & Cook

Quick and Easy Cooking with Alaska Seafood
Preparing a tender, mouthwatering Alaska seafood dish is quick and easy with just a few basic techniques. We’ll show you some of our favorite preparation methods, including grilling, plank cooking, and marinating. And since wild Alaska seafood is full of flavor, it doesn’t take much to make something that will draw rave reviews.
Try the curated collections below or jump straight to the Alaska Seafood Recipe Finder.
Quick Cooking Techniques
-
Grill
-
Prep (6 oz. fillets)*: Oil/season fish, then seal in spray-coated foil packets. Heat grill to 400°F/200°C.
Salmon: 10-12 minutes
View Grill Recipes
Cod: 8-10 minutes
Pollock: 5-6 minutes
Doneness: Firm, opaque -
Bake
-
Prep (6 oz. fillets): Oil/season fish. Place on spray-coated foil-lined baking pan on middle rack. Preheat oven to 400°F/200°C.
Salmon: 8-10 mins
Bake Recipes
Cod: 8-10 mins
Pollock: 4-6 mins
Doneness: Firm, Firm, mostly opaque -
Saute/Pan Sear
-
Prep (6 oz. fillets): Oil/season fish; place skin up in heated pan. Turn stovetop to medium-high heat.
Salmon: 3-4 minutes each side
Saute Recipes
Cod: 1-2 minutes each side
Pollock: 1-2 minutes each side
Doneness: Browned, firm, mostly opaque -
Steam
-
Prep (6 oz. fillets): Line wooden steamer with lettuce/herbs/ citrus OR spray-coat to avoid sticking. Use 2 (3oz.) portions, cut to fit. Bring 1-inch water in a 12- inch pan to a simmer.
Salmon: 5-7 minutes each side
Steam Recipes
Cod: 4-6 minutes
Pollock: 3-4 minutes
Doneness: Moist, tender, opaque -
Instant Pot
-
Prep (6 oz. fillets): Add 1 cup water to bottom of pot. Place seasoned fish on steam rack. “Steam” using quick release vent.
Salmon: 2-3 minutes
Instant Pot Recipes
Cod: 2-3 minutes
Pollock: 1-2 minutes
Doneness: Moist, tender, opaque -
Sous Vide
-
Prep (6 oz. fillets): Season fish; add 1 Tbsp. favorite sauce/broth/ water to fish in zip-top bag. Remove air using water displacement method. Add sealed bags to hot water bath. Heat water to 130°F/54°C.
Salmon: 30 minutes
Cod: 30 minutes
Pollock: 30 minutes
Doneness: Moist, tender, opaque
Quick Cooking Tips
Prep: When choosing a cooking oil to brush on your fish, select one of the following: canola, avocado, peanut, grapeseed, soybean or safflower. Avoid butter and olive oil, sunflower oil or corn oil as they can burn at high heat. Generously brush all sides of fish before sprinkling on seasoning.
Seasoning: Sprinkle on your favorite salt, pepper and additional dried herbs or spices for flavor.
Size: It’s best to cook fish of similar sizes and thicknesses to maintain uniform cooking. If seafood is thicker, additional cook time may be needed; if fillets are thin, less time is needed.
Learn to Fillet
More About Cooking Wild Alaska Salmon
Take a Fresh Look at Frozen Alaska Seafood
Wild Alaska seafood is harvested at the peak of freshness, in harmony with each species’ natural life cycle, ensuring the health of future fish stocks. Most Alaska seafood is frozen within hours of harvest using advanced freezing technologies such as cryogenic blast freezing and glazing to lock in that just-caught flavor, abundant nutrients and premium quality for year-round enjoyment.
Another plus; frozen wild Alaska seafood is better for the planet too. How cool is that?

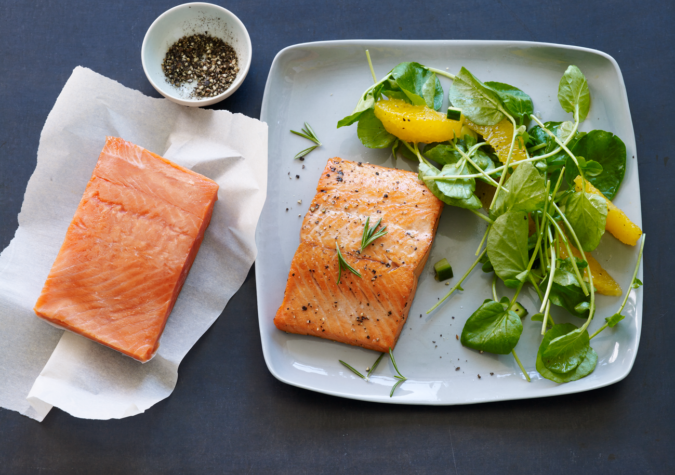
Learn how to COOK IT FROZEN!®
Experience and taste the fresh caught flavor and easy convenience of frozen Alaska seafood
There’s no need to wait for it to thaw. With Alaska Seafood’s simple, time-saving COOK IT FROZEN!® techniques, prepare a delicious, healthy meal in as little as 15 minutes cooking directly from frozen using familiar methods – sauteing, baking, steaming, broiling, poaching and grilling.
COOK IT FROZEN! HubQuick and Easy Grilling with Alaska Seafood
Grilling is one of the oldest cooking methods known to man. It’s also a fast, healthy way to preserve the natural flavor and nutrients of seafood. The following tips will make grilling easy, too!
-
Preparing the Grill
-
- Thoroughly clean the grill before you begin.
- Fish cooks best over a medium-hot fire; shellfish require a hot grill.
- Make sure the grill is hot before you start cooking.
- Liberally brush oil on the grill just prior to cooking.
-
Grilling Fish and Shellfish
-
- Cut large fish steaks or fillets into meal-size portions before grilling (so they will be easy to turn on the grill).
- Use a grill basket or perforated grill rack to keep flaky fish or smaller shellfish from falling through the grill bars.
- Brush fish or shellfish with oil, very lightly, just before cooking to prevent sticking.
- Always start to grill fish with the skin side up. (If the skin has been removed, the skin side will appear slightly darker.) This allows the natural fat carried beneath the skin to be drawn into the fillet, keeping it rich and moist. It’s also easier to turn when the more delicate or “flesh” side cooks first.
- Turn fish/shellfish only once. For easy turning, use a two-prong kitchen fork inserted between the grill bars to slightly lift fish fillets or steaks, then slide a metal spatula under the fish and turn. Use long-handled tongs to turn shellfish.
- Cook fish approximately 10 minutes per inch of thickness. Fish/shellfish continues to cook after it’s removed from the heat, so take it off the grill just as soon as it is opaque throughout. To check for doneness, slide a sharp knife tip into the center of the thickest part of a cooking seafood portion, checking for color. Remove from the heat just as soon as it turns from translucent to opaque throughout.
-
Plank Grilling Tips
-
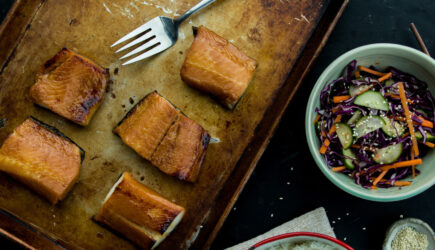
- Planking is a traditional Northwest-style of cooking using aromatic pieces of wood. It’s a great way to add subtle flavors to your wild Alaska seafood.
- Grilling gives foods a caramelized flavor, smoking a woodsmoke flavor, and planking an aromatic flavor of wood.
- Planking works best for thin foods like fish fillets or shellfish. The flavor comes from contact with the plank, so a thick steak will not get the full aromatic wood flavor that a thin fillet will.
- Arrange foods in a single layer on the plank so as much food as possible touches the aromatic wood.
-
Easy Planked Seafood Step-by-Step
-
- Purchase pre-cut planks at barbecue and grill shops or some larger grocery stores. Or go to your local lumberyard and purchase untreated hardwood lumber like cedar, oak, hickory, maple and alder. Do not use pine or other soft woods, as they are too resinous.
- Cut planks into any size you desire, but be certain that the plank will fit on your grill.
- The best wood choices for planking are cedar, alder and oak. Hickory and maple are also good.
- Presoak the plank in water for 30 minutes to two hours.
- Pat planks dry with paper towels and spray-coat or lightly oil one side of the plank (place seafood on oiled side).
- Season seafood lightly with an herb blend, a smoky-sweet rub, or just salt and pepper. Go easy, as you don’t want to overpower the flavor you will get from the plank.
- Preheat one side of the grill to medium-high, with no heat on the other, indirect side.
- Place the planked seafood on the grill on the indirect side (not over direct heat) and close the lid.
- Turn the heat down to medium.
- Check the seafood frequently for doneness after 10 minutes.
- To glaze seafood, brush on a glaze or an Asian-style barbecue sauce during the last 5 minutes of grilling or planking; cover, and let it cook to a sheen.
- Seafood changes from translucent to opaque as it cooks and will continue to cook after it is removed from the heat. Cook just until opaque throughout.
- The plank provides a beautiful, rustic platter for serving.
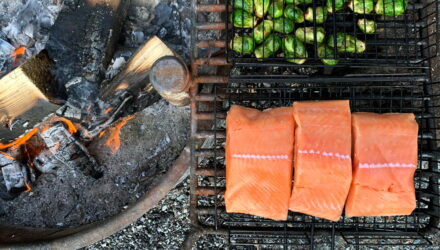
Grilling Recipes
View Recipes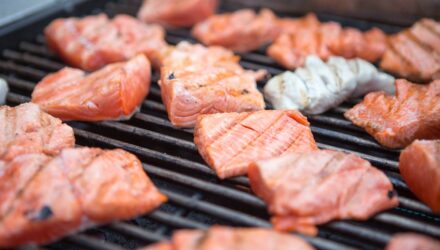
Video: How to Grill Wild Alaska Salmon
Watch Video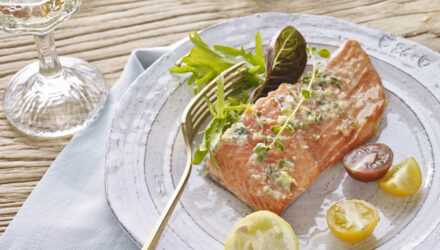
Video: How to Grill Frozen Alaska Salmon
Watch Video