ASMI Media Library


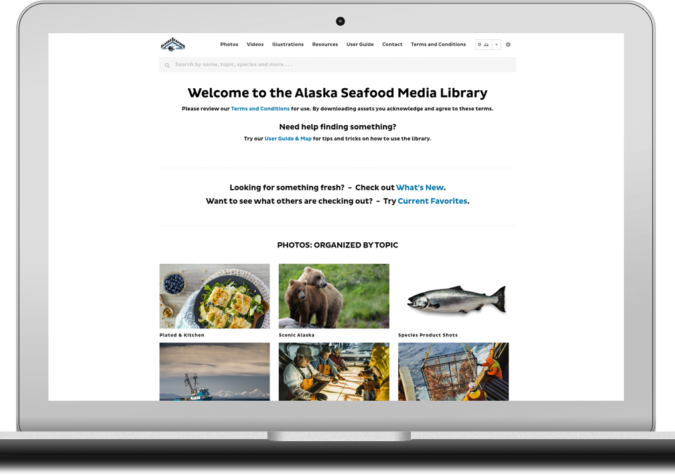
Alaska Seafood Media Library
ASMI offers media such as photos, videos and printable resources to the Alaska seafood industry through the Alaska Seafood Media Library. Sign up for an account below, and ASMI staff will review and approve in 1-2 days. Access to an account confirms you have reviewed and accepted the media library terms and conditions.
The library is updated on a continual basis.
Access the ASMI Media Library

Searching for Media
Search the media library by folder, topic, category, and file type. Create collections, share and download media, plus checkout your assets with an intuitive, “shopping cart” experience.
See below for a quick how-to guide, or log in now to explore!
Have questions about the media library, use of assets, or your account? Please contact the ASMI communications program via the contact page.
Media Library Quick User Guide
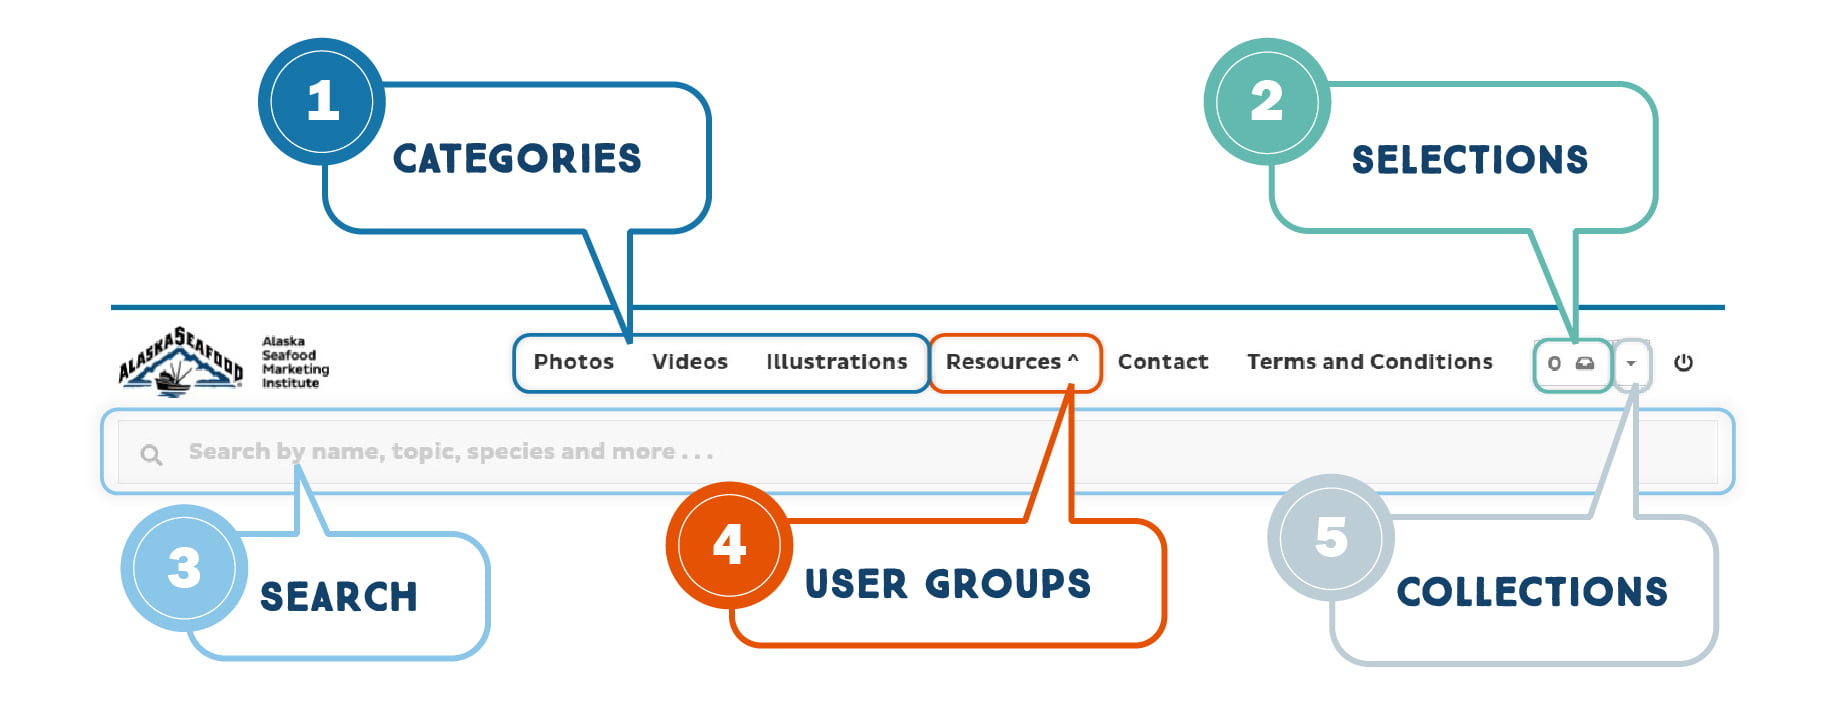
Media Library: Navigation Menu

1) Categories
Explore assets by Photo, Video or Illustration. Click the category, then browse by content topic.
2) Selections
Assets you currently have selected will appear here. Click on the button to view all your selected assets.
3) Search
Use the search bar to search by name, topic, species, audience and more.
4) Resources by User Group
Access resources tailored to you. Are you a Direct Marketer? Do you need tools for Foodservice? Select your group under the dropdown tab.
5) Collections
The Collections tab allows you to explore Collections you create or that are shared with you. Select assets and create your own collections to share.
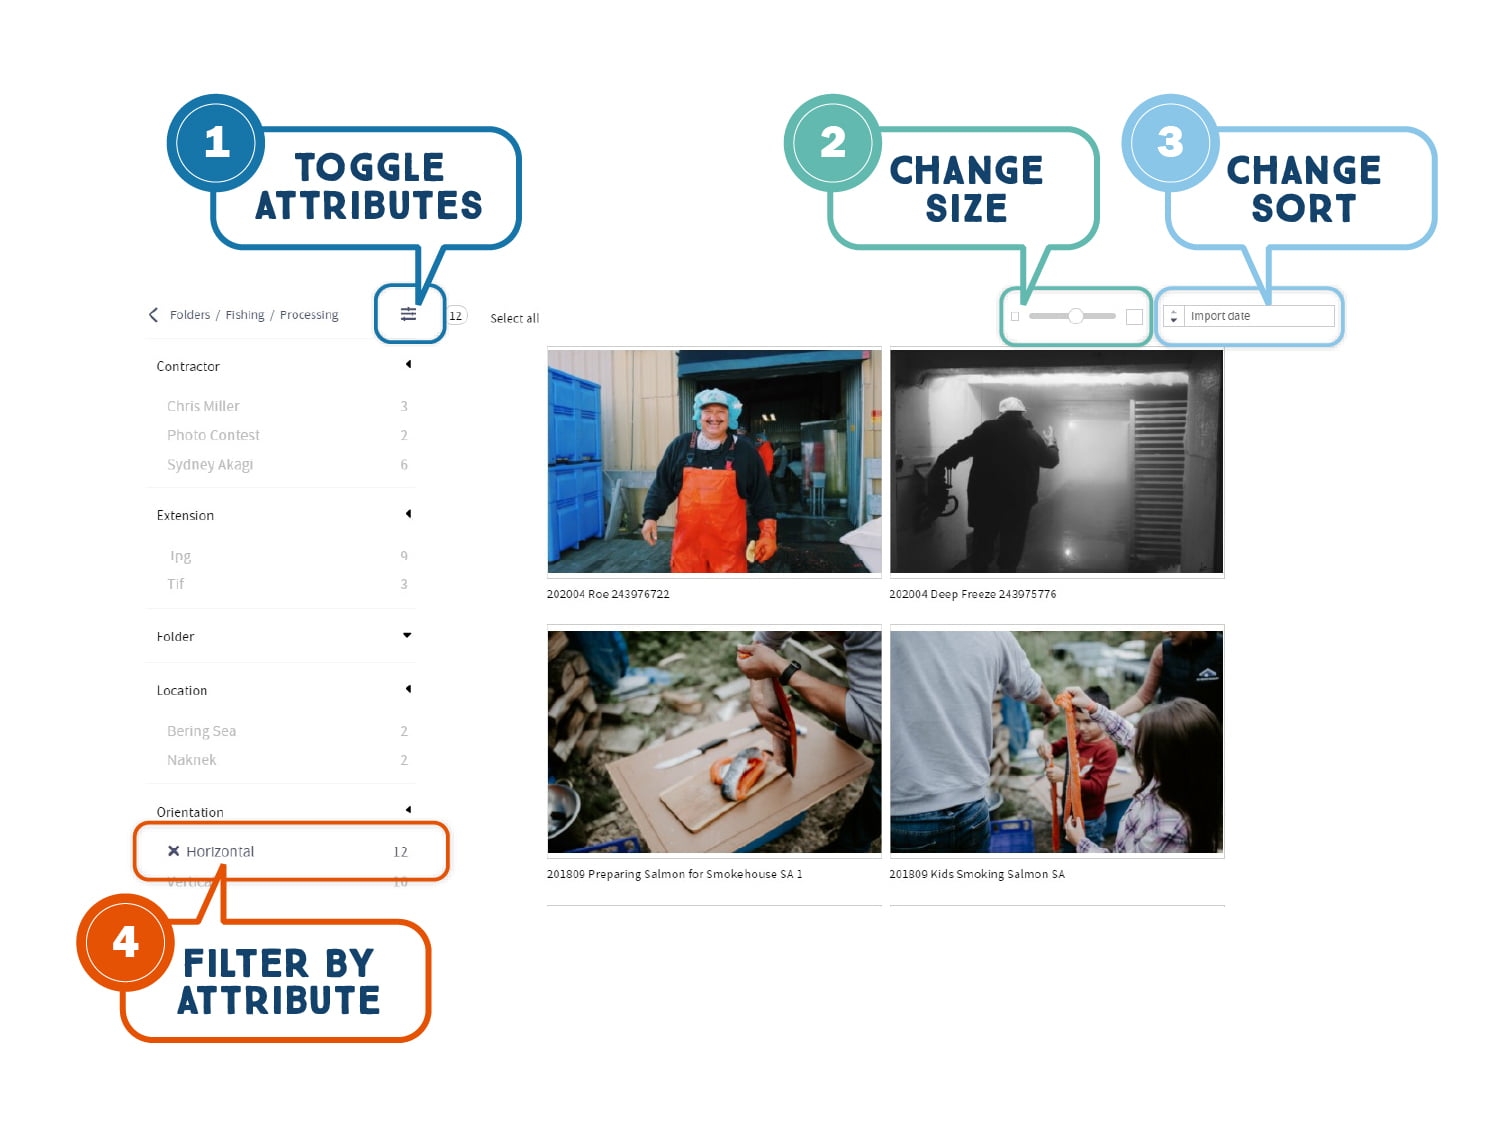
Media Library: Sort Tools
1) Toggle Attributes
Click this icon to toggle from a list showing folder organization to a list of attributes.
2) Change Size
Slide the bar to the right to enlarge the image view, and to the left to make a gallery view.
3) Change Sort
Use this dropdown menu to change the sort order of the assets that appear. For example, sort by date.
4) Filter by Attribute
Click on an attribute to filter and narrow down the assets that appear.
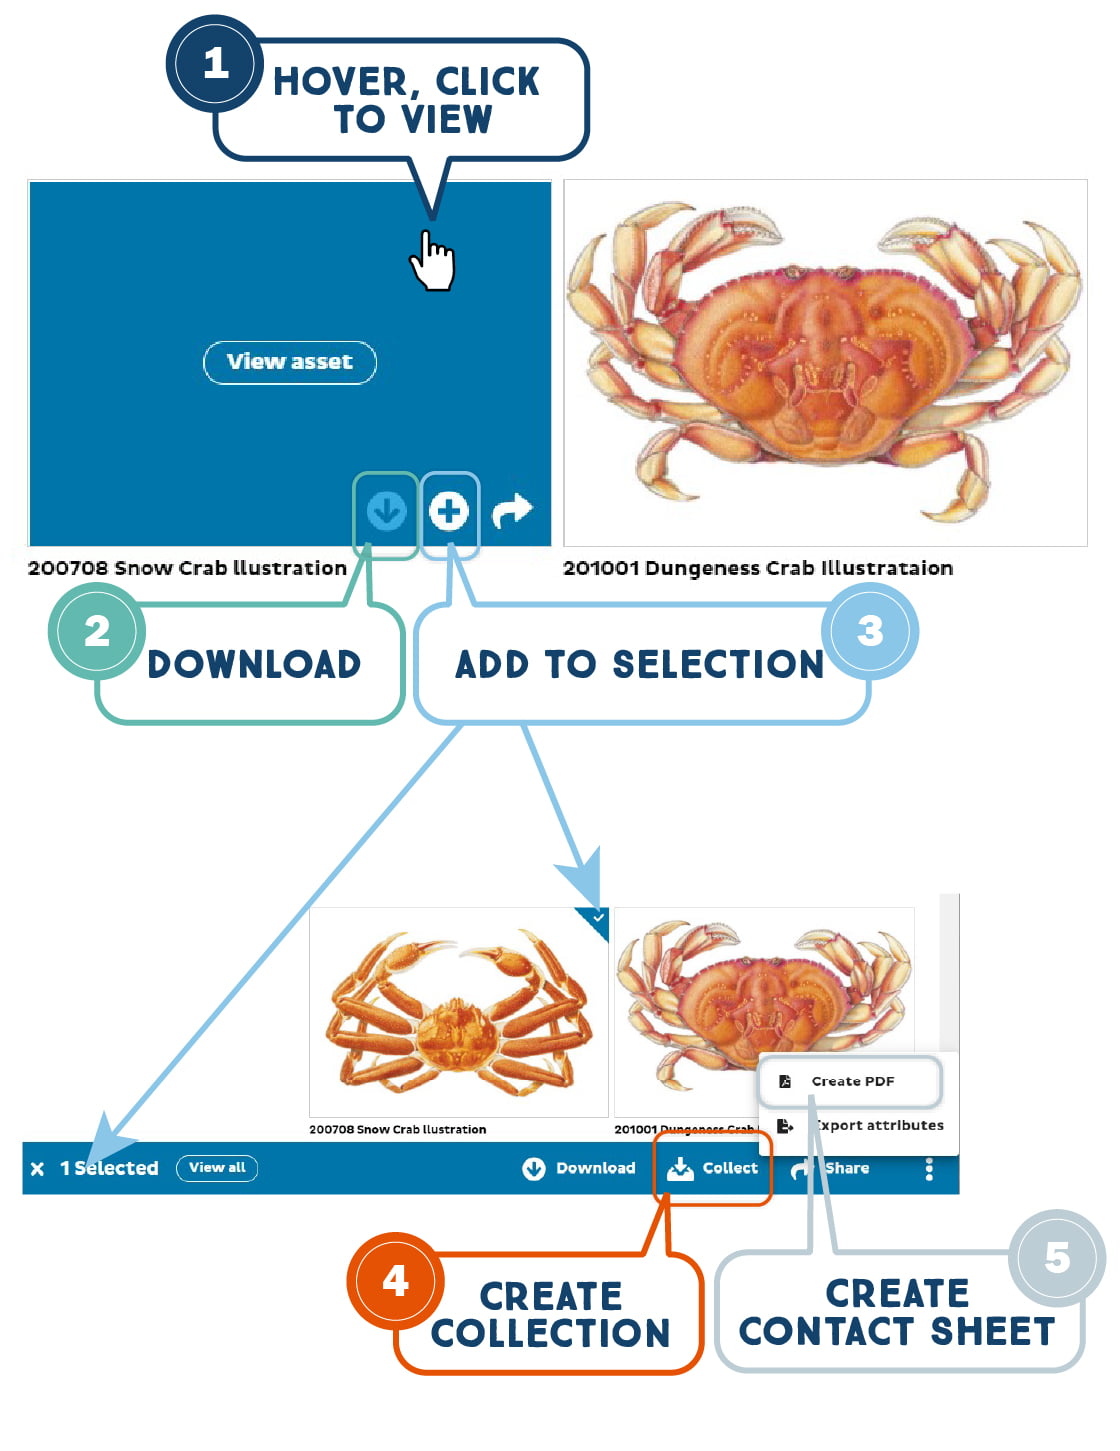
Media Library: Select, Download, Collect

1) Hover to highlight, click to view
When you hover over an assets it turns blue and icons appear in the lower right corner. Click on the asset to view it larger.
2) Download
Click the down arrow icon to initiate a download of the asset.
3) Add to Selection
Click the plus icon to add the asset to your selection bar. The selection bar will appear along the bottom of the window, with a number reflecting how many assets you have selected. The selected asset will now have a small checkmark in the upper right corner identifying it as selected.
4) Create Collection
In the blue bar at the bottom of the window click the icon with arrow and tray to create a collection of the assets you currently have selected. You can name this collection, add more assets, and share it with other users.
5) Create Contact Sheet
To create a pdf contact sheet of all the assets you have selected, click the three dots at the far right of the blue bar and then scroll to “Create PDF”.

